Using the Engravinator
Wow, seriously, pat yourself on the back. Take a break and have a snack for doing a job well done!
LOL, who are we kidding? You want to shoot lasers!
Below we'll discuss some of the basics to using the Engravinator. But really, there's no shortage of diode engravers out there and usage will be generally the same. So lots can be found online and, if in doubt, hit up the Engravinator Forum. But also definitely read all of this. It's good stuff, we promise!
Focus
Seriously, this is one of the most important things. The laser won't really cut unless it's focused to a fine point. Fortunately it's pretty easy and since the Engravinator is brought to the workpiece you really never need to refocus it in most cases.
We recommend placing the machine on a dark surface which will help you see the dot better.
Most of the diode lasers have a small toggle pushbutton on top of the controller. In most cases this is the focus button and in rare cases it just enables power to the laser at all. We'll assume you have one with a focus button. Put on your orange protective glasses, take the front panel off your machine, and press in that button to be in the down state (with power to your machine of course).
You should now see a small dot below. It will be very low power and not burn anything.
Now on the bottom of the laser module is a focus ring. Turn that and the laser dot will grow or shrink in size. At this point you just need to figure out which way does which and get the dot as small as you can. One trick is to keep turning as it gets smaller and smaller and once you see it start to get bigger, turn back the other way a little to make it smaller again.
Startup / Homing
This will be a little different for every software and controller type, but the basics are the same. Basically, whenever you start up you must home the machine. Most software will have a Home button and if not, you can home in Grbl with the $H command.
As noted in previous sections, the laser should move to the left and then back and touch-off on the endstops. The position it homes to, if configured correctly, will be 0,130 as the origin or 0,0 point is the front left corner of your machine.
If your software of choice has an option to set the desired position to move to after an engraving session, we highly recommend setting it to 0,130. That way the laser head will be out of your way.
Material Types
The first thing to know about your UV diode laser is that because of the wavelength (405 - 450nm) of light it uses lighter materials will simply reflect it instead of burning. This is one of the reasons large laser cutters use CO2 lasers which are at the opposite end, outputting infrared light, which is easily absorbed my most materials.
So, while it may seem counter-intuitive, you need to use more power for lighter materials! This only works up to a point, however, as you will find if you ever try to engrave on, for example, white printer paper. It really doesn't work at all because most of the light is reflected. So sticking to darker materials will work much better.
Some materials we've found work well are:
- Brown cardboard
- Paper / Cardstock (not white)
- Leather
- Wood (walnut, cherry, oak, cedar)
- Cork (try to use natural not manufactured which has glue in it)
- Slate (turns white when burned)
- MDF (look for "laser safe" variety without phenolic glue)
- Chocolate (seriously)
- PLA / PETG plastic (depending on color)
VERY IMPORTANT
Never, ever engrave on the following materials!
- PVC / Vinyl / Artificial Leather (releases chlorine gas)
- Polycarbonate (will probably burst into flames)
- ABS (emits cyanide gas)
- HDPE (catches fire)
- PolyStyrene / PolyPropylene Foam (catches fire)
- Fiberglass (epoxy resin emits fumes)
- Carbon fiber (epoxy resin emits fumes)
Power & Speeds
This is one of those things that honestly needs to be discovered through trial and error with the material you are using but we can at least give you some basics.
First of all, you will be always be performing a dance between speed and power. Too dark? Speed up... or power down. One always affects the other. But the thing to remember is that you are still limited to how fast the laser can be moved around and not lose accuracy. The key is to not change directions too quickly, or you will see "wobbles" in your lines.
For the Engravinator we recommend staying below 2000 mm/min when doing standard vector engraving. When doing raster engraving (like a grayscale bitmap) you can bump it up to 9000 mm/min because it's only ever going that fast in one direction and then moving very slightly in the other axis. So there's no rapid direction changes. Note that you can also run this fast usually when running a "Fill" operation which also just moves back and forth in parallel lines.
Below is just a few examples of starting points for various materials. All speeds are in mm/min.
| Material | Vector Speed | Vector Power | Fill Speed | Fill Power | Raster Sped | Raster Power |
|---|---|---|---|---|---|---|
| Cork | 1000 | 15 | 8000 | 30 | ||
| Leather | 1000 | 25 | 8000 | 40 | 8000 | 20 |
| Slate | 1200 | 100 | 2500 | 100 | 2500 | 100 |
| Cardboard | 1000 | 25 | 5000 | 70 | 5000 | 70 |
In general, always start at a lower power and ramp up until you get the desired darkness.
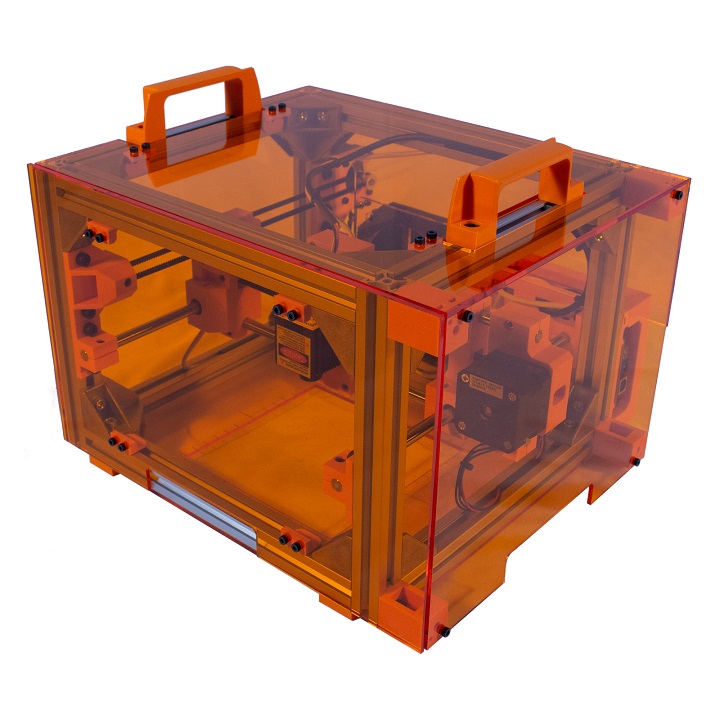
Removable Panels
Remember that the front and top panels on your Engravinator can be removed. If you only ever bring the machine to your work you'll never really need to do this. But if you ever want to treat it like a regular laser engraver you can remove them.
Just remember that they are made of 3mm acrylic and not indestructible. Do not apply too much force to remove them. If it's too hard, you likely need to adjust the plastic clips holding them on.
For the top panel, we've found it best to first remove the front panel and then push up on the top panel from the inside. This puts the least stress on the panel.
Maintenance
Your Engravinator should be able to put up with a lot of use but it will need some TLC from time to time. Such as:
- Every 20-30 hours of use oil up the 8mm linear rods with some basic 3-in-1 oil. With the machine off, put a few drops on each rail, on each side of the bearings and move the axis back and forth a couple times.
- Clean the laser lens. With the laser powered off, of course, use a compressed air can to blow any dust off the lens. If the lens is not overly recessed (sadly some are) use glasses cleaner (as in eye-glasses, not window cleaner) and a lint free cleaning paper to clean the lens. Let fully dry before using.
- Check the belt tension. Pluck the belt. It should sound like a bass guitar. If higher, loosen them up a little. If no real sound, tighten them with a 2.5mm hex wrench.
- Replace the carbon filter. You should get 100 hours of use out of it and you'll know when it's time to go as it will start to discolor. The material is sold in large sheets. $10 worth should last a lifetime.
That's really it. The Engravinator is pretty simple and doesn't require much to keep it going.